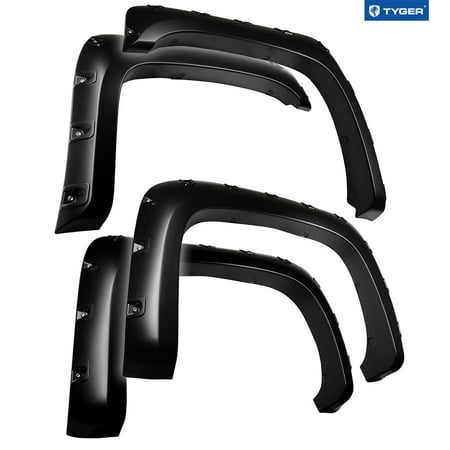
I'm pretty much an unskilled installer, but I was able to actually make this product look really great on my 2011 Silverado! It took me a half day to get rid of the original mud flaps due to salt corrosion but my mechanic lent me grinder, which zipped 'em right off with barely a scratch to the paint. It then took me another 8 - 9 hours to install, mostly due to my own lack of experience. Some hints from my own errors and misunderstandings: 1. The 'clips': there are 2 styles, one is actually a spring clamp which tightens with a screw; 4 go in the sides of each flare. Then the 2 that do actually just clip on go at the top of each flare to act as a nut for screws you put up through the flare into existing (factory) holes. I mounted the flares without help and had a very difficult time keeping the flare held up while inserting the screw up through it and into the 'clip' while keeping it centered on the factory hole (it's a blind operation, you can't see the hole). I was eventually able to do it by sticking a nail down through the hole to act as a guide that I could push out with the screw, although it was still difficult because you need to use some force for the alignment. 2. The 1' seal: maybe because of my stupidity I never realized it goes over the outside lip of the flare to seal it against the truck's fender. It's also really about 1/4' (U-shaped, 1/4' wide front and back) and they provide a tool to help separate the front and back to fit it over the fender lip. I didn't realize how the tool is used, I guess because it's the last thing depicted on the instructions, so I used my fingers to separate the front and back of the seal to fit the fender lip between them; a slow and, eventually, painful, way to do it. Also, I decided to NOT wrap the seal around the end corners of the flares since I was concerned that it may not hold on tight corners and that they may have only provided a minimal length of seal strip. As it turned out, they DO provide an adequate length to completely cover the outside edges of the flares, I had about 2' left, but it looks just fine ending the seal where the flare lip goes out of sight. 3. The hardware: I took the advice of some other reviewers and replaced the bolts and washers (not lock nuts, they're not visible and pretty protected) with stainless steel hardware, which added about $50 to the cost. 4. Removing wheels: I had to remove the rear wheels to remove the old mud flaps and, if I were doing it again, I'd probably keep them off and mount the flares immediately. The spring clamps mentioned in paragraph 1, above, require some pressure to start the small bolt in the clamps' hole, not a problem with the front fenders but pretty hard at the lowest parts of the rear. I used an offset screw driver and got it done but with a mental note to monitor them for a while.